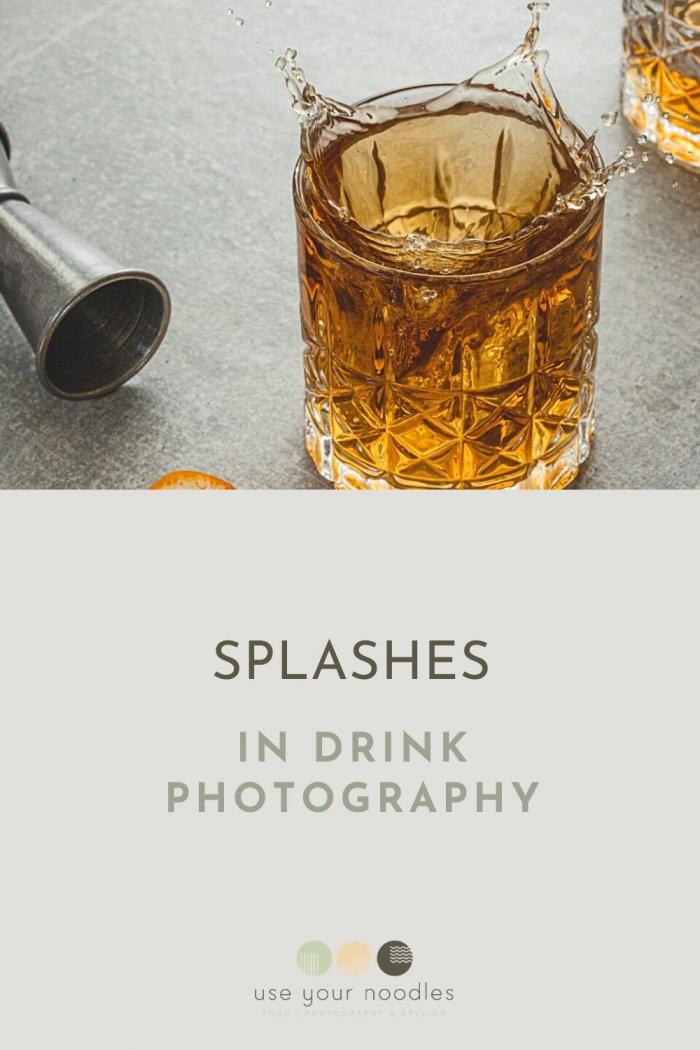
Splashes In Drink Photography
Splashes in drink photography are so much fun right? In my opinion, they brighten up photos of drinks and just make them exciting to look at.

Splashes are not the easiest and the cleanest things to do. They are, however, amazingly beautiful. While most things as food photographers we can control, there’s no way you can entirely predict how the splashes are going to turn out. Making splashes just a tiny bit more challenging. Mainly because most of the time you need to repeat them over and over again to get that perfect shot.
Let’s discuss a few things we need to do before taking the final photo and some tips that will make your life easier when you make splash shots.
1. Take a photo without splashes
The most important thing that you shouldn’t forget is to take a photo before any action is happening. I take two photos, one with a glass still empty, and one with a full glass but no action. This way I have two clean photos to work with in post-processing. Don’t take me by the word but I’d say all my splash photos are composites because there’s just no way you’ll get that perfect shot on the first try.
If you do, you should do a happy dance, for sure!
2. Prevent the glass from slipping
Okay, so the next thing you need is to attach the glass to the backdrop. I just use my son’s playdough. We have so much playdough in the house. You can of course use anything that sticks the glass to the backdrop. Make sure it’s a small amount, something you can edit out in the post-processing.
3. Prep the towels
Next, you need towels. Large towels. Trust me, I’ve had big floods happening! You need to be prepared.
And you need replacement fluid. When you do splashes the fluid from the glass will eventually get very minimal, so you need to add more. I like to prepare a large jug of whatever I’m shooting. And since I’m going to be wasting so much fluid, I use colored water, whenever possible. Just so I don’t waste actual drinks.

4. Something relatively heavy to throw in
And then next, you need to think about what you’ll be throwing in the drink to make that perfect splash. If it’s some fruit that would actually be a part of the drink, then just use that. If you only want a splash, like I’ll be doing here, then pick something that will create a nice big splash. The heavier thing you pick, the more pronounced the splash will be.
I like to use things that are similar in color to the drink or something transparent like a large ice cube. Basically something heavy enough, but not something that would break the glass if it fell on the rim.
5. Fast shutter speed
What we want to make sure of is to shoot at a very fast shutter speed. I’m using a speedlight, so for me, this will mean I need to set my flash power to low power, to get that fast shutter speed. The shutter speed on my camera is set to X, ISO to X, and aperture to X.
When you’re shooting in natural light, you can’t really use a fast shutter speed like with a speedlight or a strobe, unless you’re shooting in a harsh light situation. In anything diffused, I strive to use a shutter speed of at least 1/500s or preferably faster for drinks to get that sharp splashes.

6. Use manual focus
It’s also very important to use manual focus, so it stays the same in all the photos.
7. Use custom white balance
Also I’d steer away from using auto white balance, because you can combining images with different white balances could be a pain.
Basically, all the settings should be exactly the same for each photo you take, even the non-action ones that you take in the beginning. I have those ready and now let’s do a couple of splash shots and see what we end up with.

7. Take some test shots
Before really going in with setting up your scene, make sure all your settings are okay. I like to do some test splashes to be sure my focus is in the right place and that my shutter speed is fast enough.
If you’re the video type (who isn’t?) I also have a short video explainign these tips and showing some bts of my splash photo.


hey# im a pro photog
and these photos are ok! well done u x
Thank you Gill!
Hey Anja… Thank you for your valuable tips ,I m sure it will help me a lot in my food photography
Can I tag you in my clips .?
I m gonna learn more tips about photography in future too.
Thank you again!
❤️
Hi Priyanka, thank you so much for your kind words 🙂
I absolutely love this blog post. Thank you Anja for sharing your tips. You are amazing and I’ve definitely learnt something new!:-)
Hi Manny!
You just made my day 🙂 I’m really happy to hear you find these tips useful!
Love,
Anja
Love the way you explain & demo
Thanks a lot for your video on how you do your splash shots
Greetings Suzan
With pleasure Suzan 🙂
Love,
Anja
Thank you Dear Anja for your valuable tutorial. Will definitely try it out and tag you in my photo.Stay blessed my friend. God bless ❤